Introduction
If you have a utility room, at some point you will ask: how do I soundproof a utility room? Most of us have met that unpleasant neighbor before, yelling at us to tone down the sound of whatever we were doing. Some might even call the police for trivial, everyday chores just because they don’t like us. They demand that we stop making any noises or doing anything.
Some demands might be reasonable, like not getting your death metal band together for a practice gig on a peaceful Sunday evening. However, some aren’t so reasonable such as demands to stop doing chores important to our daily lives like laundry day.
But hey, you ask, what could be the problem with doing laundry? Surely most people around are understanding enough as to not call the police on me while freshening my underwear. Well, some might be, but others aren’t. And we all have met at least one of those horrible neighbors in our lifetime.
”Well, what to do with them then? I cannot just simply skip washing my clothes”. Fear not, my dear inquisitive reader, for I am here to show you how to soundproof your utility/laundry room. And not just that, I will make sure as to bring you the best possible way to do this for cheap.
I bring to you a general description of the cheapest and most efficient ways to soundproof your utility room and/or washing devices. Those are generally universal, and you will be able to apply them to any part of your household.
Cheap ways you can try to soundproof a utility room?
1. Anti-vibration pads
The first thing is how to properly ameliorate the vibrations and the sounds that your washing machine and dryer create. There is no better way to do this than with anti-vibration pads.
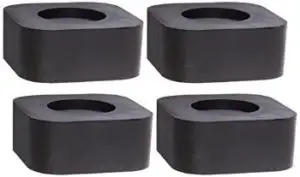
Anti vibration pads
These are true heroes. I personally can attest that my washing machine has tried to take a hike through the kitchen on a few occasions, that is until I got a set of these quadruple little wonders.
First, they decrease the vibrations and sound by many levels. Second, they are made of rubber that allows them to stick in place, holding your washing machine from going on an adventure. Also, they will make it so that your floor will remain nice and shiny, despite the constant pressure.
Also, they are incredibly cheap. On eBay for example, you can buy those bad boys for about $5.50-6.50 per set. This allows you to buy a set for each machine that requires them in your house, allowing you to afford to keep at least one for spare parts.
As to how to use them, it is quite elementary my dear viewers. You only need to get those pads under the designated machine. As an immediate result, you will quickly notice that the sound levels within the room will have decreased by at least 30% to 40%. This isn’t even part of the lack of subsequent vibration and the long-term benefits towards the life of your floor.
If, however, you are a university student who would rather spend your already dwindling money on food and other such conveniences, fear not, for there are other solutions. Though they aren’t as efficient as the pads, there are cheaper alternatives out there, ranging from cut rubber to cork pads, cardboard, and even folded towels.
2. Reinforce the door

Reinforce door
If you take a look at the generic household door, you will notice that it look a bit brittle. And if you are from the USA, chances are that your door is closer in texture to paper than wood. You would be right. They were designed to act as doors, not sound shields.
The first thing you have to do is to make sure to reinforce both sides with sound-insulating resources. The cheapest and easiest alternative to use is the soundproof door blanket, which can be found on sites such as Amazon and eBay. Attach it to the interior of the door, and it will block much of the incoming sound bound to exit the room.
It does look weird, yes, but its qualities are undeniable, and it is very easy and quick to install. Next, we move to the aforementioned rubber pads, which will bring the sound levels down to a crawl when listening from the outside.
But why stop here?
3. Cover the door sweep
We, as a species, have become the apex predator on this planet. All throughout history we have never sopped from improving
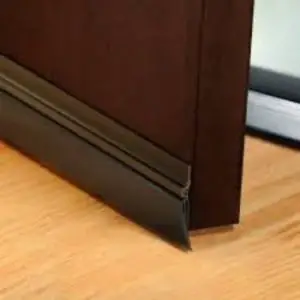
Cover the door sweep
and adapting. And, by the same logic, why should you stop going crazy on noise reduction? In all due honesty, you are saving the planet from noise pollution, yes?
No matter how thick and sturdy the floor might be, if there is even a small space between the floor and the door, the sound will still be able to pass through.
The solution to this issue is a simple one. Get yourself a common rubber (or any malleable material) door sweep from any Home Depot or convenience store. They come almost as cheap as the rubber pads I spoke of before (about $8.50-9). They do wonders in preventing sound from escaping the room under the door. Also, they are as easy to install. Most come ready with everything required to install them, and it will take you no longer than 5 minutes.
However, there are cheaper alternatives out there. These are sticking a towel or some piece of thicker clothing, rubber, or even wood underneath the door. Or you could copy the door sweep by screwing a piece of rubber to the door in a similar fashion. Unfortunately, despite the fact that they will work, the quality of the noise reduction will be much lower than desired.
The right way to soundproof a utility room
In essence, the right and proper way to soundproof a room differ from person to person, ranging from price to desired quality, convenience, etc. However, it is universally accepted that quality will always outshine all of the other considerations by a longshot. However, quality requires that which many do not possess: money and experience in the field.
Note that the following is not exclusive to the utility room and will function at the same level as any other enclosed space. They are mainly garages, furnace rooms, basements, kitchens, living rooms, etc.
So, here are the most efficient and widespread used methods and materials utilized for soundproofing:
1. Panels
The ”cheapest” and arguably the most efficient method of them all.
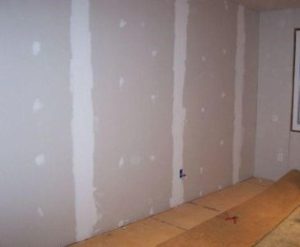
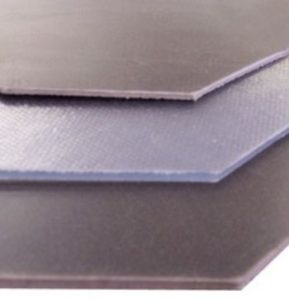
Simple drywall: This is also known as wallboard or gypsum boards. Drywall is a great source of wholesome, dense, and also inexpensive mass (about $8 for a 4 x 8 ft ratio). Being extremely dense by nature, it will do its job especially well, seeing as how mass is the key to soundproof.
Damped drywall: You can go even further with it and invest into Soundbreak XP, Silent FX, QuietRock, and Suppress gypsum boards. They are used usually in the construction of high STC wall assemblies. They incorporate, depending on the producer, at least one additional layer of sound damping material.
They are also thinner than their normal counterpart and are more cost-effective and reliable. They also are reinforced with a mold- and moisture-resistant, nature-friendly exterior, thus making them perfect for any utility rooms.
2. Mass-loaded vinyl
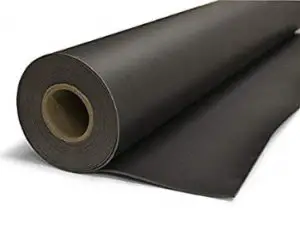
Mass-loaded vinyl or MLV
A simple, yet much more expensive alternative to the gypsum panels, is the MLV. A highly dense, flexible membrane of which Acoustiblok and SheetBlok are the most popular.
The catch with MLV is that it is best used not to isolate a room altogether. It works best when combined with other highly dense materials such as drywall. Use it as underneath or over the top layer for added efficiency or as a gap filler in between the two.
Note that this is an expensive alternative and not as good as others such as drywall or green glue.
3. Soundproof curtains
Regular cloth or wool curtains will do little in providing sound containment. There are, however, special brands of soundproofing curtains specifically made for this kind of job. Their quirk is that they incorporate at least an internal, heavy layer of MLV. You can read more about soundproof curtains on my other article here.
4. Damping Compound
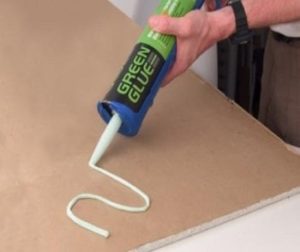
Another widely used fan favorite. It is a viscoelastic adhesive which is used as a damping layer set between layers of drywall, plywood, or subflooring. Most commonly used are the Green Glue and QuietGlue Pro compounds.
If you ever went to a cinema or studio, you already know how good this thing is. It does wonders with any sounds ranging from high-frequency (washing machines for examples) to low-frequency noises (home theaters, cinemas, clubs).
5. Acoustical sealant
Also called acoustical caulk, this is the lifeblood of whatever sound-containing project you are working on. If you skip sealing the seams with acoustical sealant, you will have done nothing.
In fact, you could use the highest quality materials for this kind of job. However, without proper sealing, the sound still will escape through all the cracks and loose spaces in between materials. And, depending on the surface of the area covered, it will be a waste of money if not done properly.
In addition, it is designed to remain permanently flexible and firm. This will allow it to overcome hardening and cracking in the long run, such as the ordinary caulk.
Conclusion
The methods and variations of materials used for soundproofing are countless. This is why I cannot speak of them all in one single article. However, rest assured that I have brought to you the most common and cost-efficient methods out there.
Should you ever make use of any of this information, don’t shy away from research. Be sure to watch at least a few guides on Youtube. There you will find many who share their craft with everyone and all of this for free.
Also, make sure to read about the proper ways to choose, buy, and install the materials. Whatever floats your boat but also soundproofs it. Have a good one.